Monday, December 7, 2009

Dr. Hawary


Dr Hawary
Originally uploaded by Dr. Emil Hawary
Dr. Hawary
Here is your comprehensive oral care that combines art and science to optimally improve dental health, aesthetics and function. Any dental treatment that is performed here in Dr. Hawaray’s California smile design dental group is to improve the appearance of your smile. We focus on improving appearance and facial self-image by correcting the alignment, shape, and color of teeth. Dr. Hawary offers cosmetic options which can improve the appearance of stained, chipped, and misshapen teeth, and correct uneven gums and replace old fillings with nearly invisible filling materials.


Teeth Whitening
The most popular option in cosmetic dentistry is tooth bleaching, which involves whitening systems that brighten stained, discolored, or dull-looking teeth.
Commonly referred to as “bleaching” teeth whitening is a process that will restore teeth to their whitest shade. It brightens stained, discolored or dull teeth.

Here in Dr. Hawaray’s California smile design dental group we offer several methods of teeth whitening, including the Zoom! Chair side Whitening System. It is an in-office whitening system that is safe, effective and fast. In just one hour, your teeth will be dramatically whiter. It is the whitening system ideal for anyone looking for immediate results. It begins with a short preparation to isolate your lips and gums. Then the whitening gel is applied which is activated by a specially designed light.

Porcelain veneers
Veneers are the next most popular cosmetic dentistry option. Used to correct chipped, cracked or worn teeth, veneers are ultra thin tooth coverings, sometimes made of porcelain or composite materials. Here at Dr. Hawary’s California Smile Design Dental Group, we offer our patients a thorough consultation in order to provide you with the opportunity to voice any concerns you may have about the treatment. It also gives Dr Hawary the opportunity to assess your teeth and advise you of the best possible treatment.

Dental implants
Dr Hawary's Implant Cases are published in The Dental Implant Blog of the International Congress of Oral Implantologists and this portrays that Dr. Hawary is the best. Dental implants are artificial tooth replacements used to counter tooth loss. Crowns, dental bridges, and dental implants can be used to replace missing teeth or correct bite dysfunction. Today's newer technology includes porcelain and ceramic tooth replacements that look real and blend with existing teeth.

Invisalign
Dr. Hawary is a premier provider of Invisalign, he has achieved an exceptional level of Invasalign case experience. Having a confident smile can change everything. And Invisalign makes the decision easy, because you can get a stunning smile without most people even noticing you're going through treatment. If you're ready for a smile that transforms your appearance, Invisalign is your answer. Although there are many choices out there, no other works as effortlessly as the Invisalign system.

Inlays/Onlays
Many patients have dental restorations that outlived their intended life. Cracked teeth and leaking worn out fillings compromise the health of one’s mouth. By replacing old fillings and cracked tooth structure with inlays or onlays, we are able to achieve a conservative restoration, saving all the healthy tooth structure that remains. A strong piece of porcelain is fabricated and bonded onto the tooth, for a natural looking restoration that strengthen the tooth unlike silver, mercury fillings which actually weaken a tooth and frequently causes teeth to fracture

Diagnosis
The diagnosis of an aesthetic problem involves looking at the entire face; the color of the eyes, skin, and lips often influence the appearance of teeth. The face evaluation is usually divided into imaginary thirds: the first section goes from the hairline to eyebrows, the second from eyebrows to the base of the nose, and the third from the base of the nose to the lower border of chin.
Treatment
Minor corrections in shape and positions can be done with direct resin bonding and ceramic veneers. If the problem is related to position and is considered to be moderate to severe, it is possible to correct it through the placement of veneers, full crowns, or by orthodontic treatment.


Monday, November 9, 2009

Dr. Ihab Hawary - California Smile Design

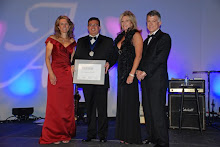
Dr. Ihab HHawary of California Smile Design has achieved Accredited status in the American Academy of Cosmetic Dentistry (AACD) – joining only 266 dentists world wide who have earned this prestigious designation. Celebrating his artistic skills, the AACD awarded Dr. Hawary multiple gold medals for his entries in its last Smile Gallery Competition. In addition, the AACD has also published several of Dr. Hawary’s cases in The Journal of Cosmetic Dentistry.

Introduction
When it comes to single tooth replacement in the esthetic zone, an implant-supported crown is often the treatment of choice because it requires no preparation or involvement of other teeth and still provides an acceptable result. However, managing the soft tissue enclosure around the restoration is a key challenge in achieving a life like appearance in the final result. This challenge is met with a very high level of mastering and coordinating multi-disciplines to accomplish the surgical, prosthetic and functional requirements that are necessary in producing a seamless restoration which is harmonious with the adjacent teeth.

History

The patient was a 41-year-old professional male in excellent health. Dr. Emil Hawary’s Patient presented to the office as an emergency after a bicycle accident that resulted in vertical and horizontal fractures of his upper right central incisor. Patient had already been admitted to a hospital’s emergency room to treat his forehead, nose and lips’ cuts, and where it was confirmed that he had no bone fractures.

Clinical Data

Clinically, all soft and hard tissues were within normal parameters. Radiographs indicated sound bone support.

Periodontally, the patient had some gingivitis with no significant pocketing and minimal bleeding upon probing. His home care was fair; there was generalized calculus and stain. The anterior gingivae were normal and scalloped, and gingival heights were relatively even. The papillae were normal and fairly even.

The posterior teeth were sound, most unrestored and not in need of treatment. His tempromandibular joint was asymptomatic with no internal derangement and no crepitis or clicking of the joint. He had a class I occlusion with a minimal overbite and overjet relationship. The entire dentition was carries free and there was no tooth mobility. Radiographs revealed no periapical pathology.

The axial inclinations of teeth # 8 and # 9 were canted with wear of the incisal edges giving a reversed smile line. The upper and lower incisors were misaligned and crowded with mesial and buccal rotation of tooth # 9 contributing to the upper centrals’ width discrepancy and the cant of the midline. Tooth # 8 had several micro cracks due to the trauma. Tooth # 25 distal incisal corner was chipped.
After analyzing his study models, careful consideration was given to the midline and the two centrals to achieve a symmetrical result. Overall, improving patient’s smile will enhance his image and his personal satisfaction.

Diagnosis
The upper right central incisor had a hopeless prognosis due to the vertical fracture and required extraction and prosthetic replacement. Once tooth # 8 was extracted, especially if a delayed fixture placement or a two-stage immediate implant placement surgery protocol were considered, there will be an increased risk of soft tissue loss. Also, the patient’s original smile was not esthetically pleasing. There was a tooth width discrepancy between teeth # 8 and # 9 and the midline appeared to be canted. It was determined that veneering tooth # 9 in addition to replacing tooth # 8 with an implant-supported crown would accomplish the patient’s goal of a more uniformed and symmetrical smile. Longer incisors would result in fuller, more pleasing smile that would correct the reverse smile line. Central dominance would be achieved by increasing their length. Finally, composite bonding to restore the distal incisal corner of tooth # 25. Patient was motivated to improve his appearance with conservative treatment modalities.

Treatment Plan

Dr. Emil Hawary ordered A complete set of records to be taken which included full radiographs, study models and a set of 35mm digital photographs showing all twelve views as recommended by the AACD.
Before initiating treatment, diagnostic casts were mounted on a semi-adjustable articulator. This allowed for analysis of the occlusal factors influencing this case, as well as for a diagnostic wax-up to be fabricated to assess the effects of the proposed treatment, which was to be an implant-supported Lava Zirconium crown for tooth # 8, Feldspathic veneer for tooth # 9 to improve symmetry, and composite bonding to restore the broken distal incisal corner of tooth # 25.

A lengthy discussion of treatment modalities aided in the formation of the treatment plan.

The proposed treatment sequence was as follows:

■Extraction of the upper right central incisor, followed by
■Immediate placement of a root-form endosseous implant and the immediate placement of a provisional crown on a temporary abutment in order to preserve the interdental papillae and labial soft tissue margin
■After a sufficient healing phase that allows integration of the implant fixture and stabilization of the labial soft tissue, assessment of the soft tissue enclosure and the need for and performance of any additional periodontal procedures
■A fixture-level implant impression for a custom zirconium abutment for the implant replacing tooth # 8
■Preparation of tooth # 9 for a Feldspathic veneer and an impression to capture both the veneer and the implant custom zirconium abutment for a Lava Zirconium crown
■In-office teeth whitening
■Direct resin bonding of distal incisal corner of tooth # 25
■Permanent placement of the veneer and temporary placement of the crown on the permanent implant abutment, to continue to assess soft tissue issues and to allow for shade adjustment of the crown
■Permanent placement of the Lava Zirconium crown of tooth # 8
■Fabrication of a night guard
An upper and lower maxillary impressions were taken to construct study models for a diagnostic wax-up. Impressions of the wax up were made in polyvinyl siloxane putty material. The wax up models were duplicated in stone in order to create a vacuum formed stint that was used as prep guide for tooth # 9 to help preserve as much tooth structure as possible and direct resin bonding of tooth # 25.

Armamentarium

■20D EOS Digital Camera (Cannon; Tokyo, Japan)
■3.5 magnification loupes (Designs For Vision; Ronkonkoma, NY)
■Jeltrate Plus Alginate (Dentsply / Caulk; Milford, DE)
■Yellow Hydrox Stone (Kerr; Orange,CA)
■Topex 20 % benzocaine topical anesthetic (Sultan Chemists; Englewood, NJ)
■Septocaine with 1:100,000 epinephrine (Septodont; New Castle, DE)
■The Wand (Milestone Scientific; Livingston, NJ)
■Periotomes (Salvin Dental Specialist)
■Root-form Tapered Groovy implant 5/ 16 mm (Nobel Biocare; Yorba Linda, CA)
■Torque driver (Nobel Biocare)
■PepGen P-15 Flow & PepGen P-15 1.0 enhanced bone graft (Dentsply Frident CeraMed; Lakewood, CO)
■Temporary abutment NobRpl WP (Nobel Biocare)
■Ultra-etch 35% phosphoric acid (Ultradent; South Jordan, UT)
■Optibond Solo Plus bonding agent (Kerr; Orange, CA)
■Optilux 501 curing light (Kerr; Orange, CA)
■Pink opaque composite (Cosmedent; Chicago, IL)
■Microbrush disposable applicator brush ( Microbrush International; Grafton, WI)
■Splash polyvinyl siloxane impression material (Discuss Dental; Culver City, CA)
■Vaccum-formed copyplast stent: temporary fabrication (Schofu; San Marcus, CA)
■Luxatemp provisional crown material (DMG/ Zenith; Englewood, NJ)
■Fine diamond finishing burs (Brasseler; Savannah, GA)
■Fine articulating paper (Bausch; Nashua, NH)
■Unwaxed Floss (John O. Butler Co., Chicago, IL)
■Procera zirconium implant abutment (Nobel Biocare)
■Vacum-formed copyplast pin hole preparation guide (Schofu)
■Gingival Retraction Cord (Ultradent; South Jordan, UT)
■Diolase Plus, soft tissue laser (Biolase Technology; San Clemente, CA)
■Impergum polyether impression material (3M Espe; St. Paul MN)
■Denar semi-adjustable articulator (Waterpik)
■Vaseline petroleum jelly (Chesebrough Ponds USA; Greenwich, CT)
■TempBond Clear temporary bonding material (Kerr; Orange, CA)
■Zoom2 Whitening System (Discuss Dental; Culver City, CA)
■Vita 3D shade guide (Vident; Brea, CA)
■Microetch air abrasion (Denville Engineering)
■Superoxol hydrogen peroxide (EPR Industries Chemists; Pennsauken, NJ)
■Consepsis (Ultradent)
■Peridex cholorhexidine gluconate rinse 0.12% (Omni; West Palm Beach, FL)
■Implant Provisional temporary cement (Alvelogro; WA 98592)
■Silane coupling agent (Ultradent)
■Gluma desensitizer (Hereaus Kulzer; Armonk, NY)
■Rely-X veneer cement (3M ESPE)
■De-Ox oxygen inhibiter gel (Ultradent)
■# 12 scalpel (Bard-Parker; Franklin Lakes, NJ)
■Vision Flex diamond strips (WS37ET) (Brassler)
■Ceramiste points (Shofu)
■Dialite porcelain polishing kit (Brasseler)
■Morely Anterior preparation and contouring kit (Brassler)
■Renamel Creative Color Composite Stains (Cosmedent; Chicago, IL )
■Renamel microfill, hybrid, and opaquers (Cosmedent; Chicago, IL)
■IPC Carver (Cosmedent; Chicago, IL)
■Clear Mylar Strips (3M ESPE; St. Paul, MN)
■#1 & #2 brushes (Cosmedent; Chicago, IL)
■Mopper anterior composite preparation and finishing system (Brassler)
■Sof-Lex finishing and polishing strips (coarse, medium, fine, super-fine) (3M ESPE; St. Paul, MN)
■Blue and pink cups and points (Cosmedent; Chicago, IL )
■Flexibuff discs and Enamelize polishing paste (Cosmedent; Chicago, IL)
■Diamond burs 6844 0141, 6844-016, 6850-014, 6850-018 (Brasseler)
■Accufilm indicator liquid and articulating paper (Parkell; Farmingdale, NY)
Treatment by Dr. Emil Hawary

Before commencing the surgery patient was shown the wax up which he liked and approved the start of treatment.

Topical anesthetic was applied on the gingival tissues above the maxillary central incisors and the surgical site was anesthetized with Septocaine with 1:100,000 epinephrine local anesthetic infiltration.

Special attention was given to preserve labial and interproximal bone and not to disturb the surrounding soft tissue as much as possible; therefore tooth # 8 was extracted using periotomes. Also, in order to remove any remaining granulation tissue, the site of the extraction was thoroughly curetted. Immediately after that, a tapered root-form implant fixture (tapered groovy 5 x 16 implant, Noble Biocare) was then placed into the extraction site which had been sized and extended to provide immediate fixation. The preparation of the socket extension was positioned to follow the long axial of extracted tooth.

When approximately two thirds of the implant fixture’s length had been placed, bone graft material (mixture of PepGen P-15 Flow and PepGen P-15 1.0 g; Dentsply) was placed into the differential between the fixture and the socket wall, and the fixture was advanced a few turns. This sequence was repeated until the fixture was fully seated to the level of the bony crest, approximately 3 mm below the gingival margin as measured on the labial. This technique causes the particles to be slightly compressed into the defect and results in excellent primary implant fixation.

Then a temporary abutment for the implant fixture was cut to length to keep it out of occlusion and it was coated with an opaque composite in order to eliminate any gray shine-through of the metal abutment. The temporary implant abutment was screwed into the fixture and a vacuum-formed matrix was fitted over the anterior teeth to locate the screw access hole for the abutment. Then a matching hole was created through the matrix. A cut section of large size disposable applicator brush handle was placed into the hollow center of the abutment so that when the temporary crown form filled with provisional crown material was seated, the brush handle protruded through the hole in the matrix and the screw access hole was maintained clear of the provisional material.

When set, the temporary crown on the abutment was unscrewed and removed. Additional composite was added from the abutment collar to the soft tissue margin area to support and maintain the soft tissue contour, creating a natural emergence profile for the provisional crown. The provisional abutment /crown was then contoured, adjusted to position it just out of occlusion, and polished all the way down to the collar of the temporary abutment. This assembly by hand onto the fixture and the access hole was closed with cotton and flowable composite.

The patient was monitored over the following three months to allow soft tissue healing and to ensure that a stable gingival margin around the implant abutment existed. During this phase, some gingival margin contouring was performed on tooth # 9 using Biolase laser.

A fixture-level implant impression was taken with polyether impression material in a custom tray (open tray implant impression technique). The impression was taken immediately on removal of the provisional, therefore giving very accurate gingival placement. It was very important that the implant abutment be waxed to the correct subgingival contours in order to give the identical tissue support as the provisional had done, and to ensure that contours led to a maximum distance of 5 mm from bone to interproximal contact. This would give good papilla support and prevent black triangle from developing.

By using the accurate gingival contours from the impression, the margin was placed approximately 1 mm subgingivally; this would allow excellent esthetics and ease of resin cleaning during seating and bonding of the crown. The provisional had established the accurate positioning of the gingival margin.

The plan was for a custom zirconium abutment shaped with a central incisor-like cross section with a 1-mm subgingival margin created for the accompanying Lava Zirconium crown. Some shade-matching challenges were anticipated because of the pure opaque white nature of the zirconium abutment. When dissimilar restorative materials are used, it is important to establish similar values before any addition of chroma is made. Excellent communication with the laboratory, with a mutual understanding of both clinical and technical challenges, will facilitate the pursuit of excellent treatment outcome. The provisional abutment crown was installed back in the mouth in the same manner as before.

Patient’s teeth were bleached with Zoom2 Whitening System (Discuss Dental). Post-op instructions were given. Patient came few days later and shade selection was made.

Three weeks later, the custom-made zirconium abutment was tried onto the implant fixture and a radiograph was taken to confirm complete seating of the abutment. The abutment screw was torqued down to 32 N cm with a torque driver. Tooth # 9 was prepared for a veneer and an impression was taken for the # 9 veneer and the # 8 crown. Provisional restorations were fabricated in a clear matrix material. The provisionals were trimmed, polished and cemented.

A laboratory prescription was prepared with a detailed description of the requested restorations, including a shade map, specification of crown form and length, surface texture, and incisal edge treatment. This was sent to the laboratory along with preoperative photographs, photographs of the preparations and provisionals, and the impressions and models. A wash bake of dentine was performed on the high value coping until the shade of the coping was identical to that of the stump shade of the prepped veneer of tooth # 9, then the Lava Zirconium crown of tooth # 8 and the Feldspathic veneer of tooth # 9 were layered simultaneously to mimic each other.

Prior to the insertion appointment, the restorations were thoroughly inspected and placed on the articulated master cast to assess them on the dies for marginal fit, crown form, and occlusal contacts.

After the patient was given local anesthetic, the provisional restorations were removed, the prepared teeth were cleaned, and the completed restorations were tied in place with the aid of try-in paste for the veneer. Aspects of fit, color, and contour were then revaluated and the restorations were shown to the patient for approval by Dr. Emil Hawary of Califronia Smile Design.

When both the patient and I were satisfied, the restorations were prepared for insertion. The veneer was thoroughly cleaned and the inside surface was etched with 35% phosphoric acid, dried, and then treated with a silane coupling agent. It was coated on the interior with bonding agent and set aside under a light proof cover.

To prepare it for bonding, the veneer preparation was etched for 15 seconds with 35 % phosphoric acid, rinsed, lightly dried, then wet again with a desensitizing agent and blotted to a damp surface. The veneer preparation was then coated with bonding agent, gently air-dried, and cured for 20 seconds. The interior of the veneer was filled with the light-cured resin cement. The restoration was carefully positioned, held securely in place, and then tacked in place with the 2-mm tip on the curing light for 10 seconds. The excess cement was carefully removed from around the margins and interproximally with soft brushes and dental floss. Oxygen-inhibitor gel was placed over the marginal areas and the restoration was cured for 90 seconds on each surface with the curing light.

The Lava Zirconium crown was assessed for shade match with the bonded veneer additional staining was applied, and the crown was reglazed in the porcelain oven. The crown was then temporarily cemented into place using Implant Provisional temporary cement. Lateral and protrusive excursions were checked with fine articulating paper, minor adjustments were made, and any excess cured cement was removed from around the margins of the veneer before the restorations were polished using a porcelain polishing kit.

Bonding was initiated with the placement of 37% phosphoric acid on the preparation of tooth # 25 for 15 seconds. Acid was rinsed off, and then teeth were damped with cotton pellets, leaving the surface moist. Next, a dentin sealer was placed (Gluma). A dentin primer and resin adhesive (Optibond Solo Plus; Kerr) was placed on the surface of the teeth and cured with a 501 Opilux light for 10 seconds. The polyvinyl siloxane matrix was then positioned on the lingual aspect of tooth # 25. This initial layer created a lingual shell to act as a support for the rest of the restorations. A thin layer of pink opaquer was placed to block out any shine through or transition from tooth to composite. After 20 second cure, a second layer of microfill A1 was sculpted to mimic the mamelons then cured for 20 second. In the incisal one third, room was left to add light incisal microfill. This was sculptured with IPC carver and #1 and #2 brushes to create slight developmental depressions. Then it was cured for 60 seconds with De-Ox. Long flame shaped, red-stripped diamonds were used to create the shape of the central incisors.

The patient returned four weeks later for reassessment of the # 8 crown for stability of the gingival margin position; it appeared unchanged. The crown was then removed and recemented with Rely-X Unicem resin cement. An impression for an occlusal mouthguard was made at this appointment. An examination two weeks later revealed no functional or esthetic problems. The postoperative photographs were taken at this time.

The contours were refined with the upper anterior composite finishing kit. The finish was generated with blue and pink points and cups: coarse, medium, fine and super fine finishing and polishing strips and Flexibuff discs with enamelize paste. Occlusion was adjusted in centric occlusion and eccentric excursions prior to the final finishing and polishing.

Summary & Conclusion

The patient was very satisfied by Dr. Emil Hawary of California Smile Design with the treatment outcome – a natural-appearing replacement for his extracted central incisor. He was particularly pleased that at no time during the course of the treatment did he require a removable appliance. He also appreciated that other teeth did not require preparation as bridge abutments. We were able to exceed his expectations in creating an esthetic, bio-acceptable restoration.

The innovations and advancements in implant techniques and technology have greatly added to our treatment options for esthetic tooth replacement.
References

Frank Spears, DDS, MSD, Advanced Esthetic & Restorative Management, Seattle, WA (May, 2004)

Jimmy Eubank, Jeff Morely, Advanced Anterior Esthetics, Hands-on Lectures (February – April 2005)

Jimmy Eubank, Jeff Morely, UCLA Esthetic Continuum, Level I (July – September 2001)

Dennis Tarnow, DDS “Biological and Clinical Factors for Ultimate Esthetics Around Implants”, AACD Atlanta, 2007

Peter E. Dawson, DDS, “Combining Smile Design with Function”, AACD, Nashville, 2005.

Lynn Jones, DDS “The Art of Matching Select Porcelain Restorations to the Anterior Teeth: Accreditation Case Type 2”, AACD Atlanta, 2007

Brian LeSage, DDS “Single Tooth Replacement: Turn the Challenge into Predictability”, AACD Atlanta, 2007

Frank Spears, DDS, MSD, State of the Art Esthetics, Seattle, WA (October, 2004)

Frank Spears, DDS, MSD, Occlusion in the Clinical Practice, Seattle, WA (January, 2004)

Frank Spear, DDS “Contemporary Esthetic Technique and Materials Part 1 & Part 2”,

AACD Atlanta, 2007

Corky Whillhite, DDS, “Freehand Cosmetic Bonding Techniques”, AACD, Nashville, 2005

Douglas A. Terry, DDS, “Imagination + Form + Color = Natural Esthetics”, AACD, San Diego, 2006

John Weston, DDS, “Direct Freehand Bonding: Creating Esthetic Success for Accreditation Cases”, AACD, San Diego 2006

Tags: California Smile Design, Dental Implants, Dr. Emil Hawary, Dr. Hawary

Dr. Emil Hawary’s of Califronia Smile Design cosmetic and reconstructive cases are published in The Journal of Cosmetic Dentistry.•October 14, 2009 • 1 Comment

Dr. Emil Hawary’s of Califronia Smile Design cosmetic and reconstructive cases are published in The Journal of Cosmetic Dentistry.


Dr. Hawary